Thursday 1 June 2017

Paper Lantern - Mix It Up Challenge #2

Hi everyone, it's a brand new month and that means it's time for a brand new challenge over at Mix It Up Challenge Blog and I am so excited to share this project with you!   Every week we provide you with an anything goes challenge and an optional twist...  this months twist is stamping... hope you guys will play along! Here is what I came up with...


 I have been seeing paper lanterns decorated up on Pinterest a lately,  so wishen I found the lanterns at my local dollar store I got excited... I knew I wanted to do something with that.  I haven't done much stamping lately but I thought I would take out my old Heartfelt Creations stamps and start by making some flowers. I wish I could remember the name of these flowers but this is just simple flowers and any style petal flowers will do... I used 2 sizes of blooms and made 3 large flowers and 2 smaller ones to create my clusters.


Once they where stamped and cut them with a coordinating die... one of the reasons I love working with Heartfelt Creations stamps is that they almost always have a coordinating die! I added some color to them with some distress inks.


Then the fun stuff, I crumpled the up a bit and used my stylus behind each petal to shape the flowers the bigger flowers consist of 2 larger flowers and 1 smaller while the small blooms are 2 small flowers. I them added 2 punched suns and a gem to complete... here is a closeup of the larger bloom


I stamped some leaves with swirls, a stamp and die set from Heartfelt Creations on green card stock and cut those with the coordinating die then cut the die in peach so that I could layer them to have green leaves and the peach swirls. I stamped some butterflies to fill in my design. I decorated the swirls and butterflies with stickels and pearls for an added little touch then arranged the prices onto my lantern and voila! My  embellished paper lantern!!! Here are a few additional close ups


There you have it! Hope you will be joining us this month at MIUCB...remember...  you can enter up to 5 projects each month and the twist is always optional! I can't wait to see what everyone comes up with! Happy crafting!


Monday 1 May 2017

Treasure - Mix It Up Challenge #1


It's the first of the month so it's Challenge time over at Mix It Up Challenge Blog and I am so happy to be posting my first project as a mix it up girl.  So here is how it works...  every month we will host a challenge,  you are free to create anything ou like including,  mixed media projects,  altered art,  art journal page and/or paper crafts,  if you do it we want to see it...  you can enter up to five projects every month!  The theme will always be Anything Goes but we will always throw in an optional technique to use on your project, this week it's Embossing  you can decide to do it or not but a technique is a great starting off point when you are stuck! Here is what I came up with...


I really didn't have a clear plan when I started but I figured that I would start with a focal point so I  cut 2 hearts out of cardstock and ran them through a diamond pattern embossing folder, I inked the mraised areas so the the embossing would show up a bit better but I t still looked a little plain to me so I took out my heat gun and added 2 coats of UTEE (ultra thick embossing enamel) on them but that pushed the diamond pattern to far back so I decided to embed some crystals to emphasize the pattern. It took some work to get there but I love these double embossed hearts, here is a close up


I grabbed a chip board word that I had in my stash, it's from dusty attic! They have beautiful products and I have a drawer full that I have been hoarding for years, I am really trying hard to work through my stash! I was coating it with gesso when I wondered if I could use the gesso to emboss, and I can, I used some Zing red glitter embossing powder on the wet gesso and blasted that with the heat gun. Love the way it embossing powder stuck to certain parts but not everywhere, it would have taken me forever to get that shabby look using clear ink! To make it pop off the hearts I added some gold and brown paints especially around the edges! Here is how that came out


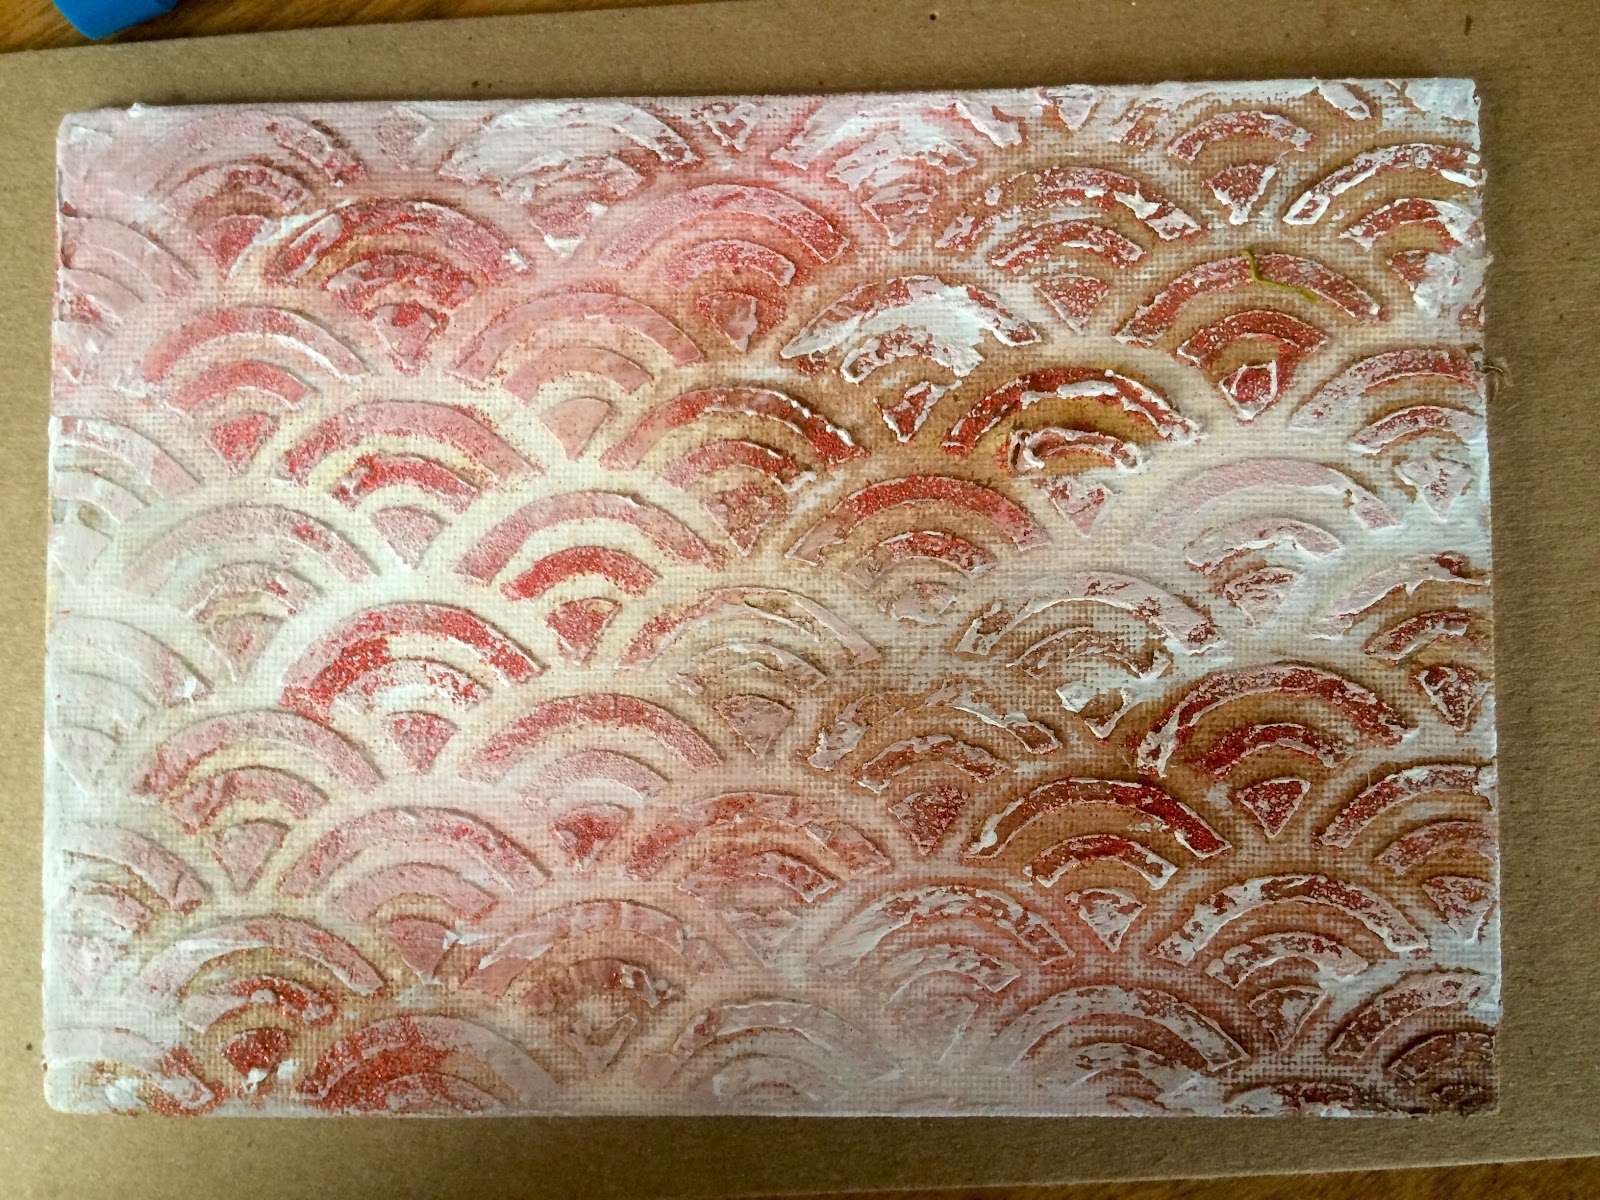
Them came the actual canvas, I used a 5x7 canvas board and thought I would get some texture with some modelling paste and a stencil and I figured if I can use embossing powder with gesso I can probably do it on modelling paste too, and I did! See what I mean by letting the  technique inspire you... I shabbied (is that a word? It should be) the panel by sanding down some area and adding some white, red and brown paint and played till I had something that I liked finished it off by wrapping some twine around board and voila...


I decided that it really needed a little something extra to tie it all together I found a pink daisy in my stash and started to throw some paint on it to make it work with the rest of the pieces so I dabbed on some white red and gold but I really didn't like it... I went digging in my stash and fond a bottle of unopened glass beads, to tell you the truth I have no idea when and why I bought them but it was the perfect touch to finish off the bloom, here is a before and after just to show that I always keep going till I am happy with the piece I am working on...


And there you go I framed my panel and added all the elements that I created and here again is the finished piece...


I really hope that you will join us in our challenge this month, remember you can submit up to 5 projects and you have a whole month to play along! I can't wait to see what you do! Have fun!!!

Wednesday 5 April 2017

Mix It Up Challenge

I am so excited to let you know that I made the cut.... I was excepted on a brand new challenge Blog Design Team! I am truly excited to start this new endeavour as a Mixed Up Girl! (Isn't that a great name?) I will be sharing some inspiration every month and if you check back here I will have tips and tricks, as well as some picture tutorials. If you aren't a subscriber to my blog, you should be! We go live on May 1st you will want to check out The Mix It Up Challenge for fun technique based challenges!


I am really excited to see what you all will create so make sure you come play with us! I can't wait to see you guys there!!

Monday 27 March 2017

Welcome Spring!

Hi guys! Just wanted to share my latest project with everyone, it is a bit different then the normal paper-paint crafts that I normally do but I like creating all sorts of different projects and so I thought I would share this too!!! I am playing along at Love To Craft Challenge Blog #8 Anything Goes, I love that they accept all sorts of crafts, not just cards and pages because if you are anything like me you probably like to change things up once in a while!  I recently went to Micheals and while I was there they had a 50% off there entire floral department and who can resist a sale, that is just silly, I am not known for my will power! I have been wanting to create a centrepiece for my kitchen table for quite some time so... here is the finished piece... I am so happy with the way it turned out!


Never be afraid of trying something new, you may be surprised at what you can accomplish!  I started gathering random blooms, big ones & smaller ones just using steams that seamed to go well together with lots of greenery, I can't stress the difference a little greenery adds to the look of the arrangement! A cute little container, this shabby metal pot was exactly what I was looking for! I started with the biggest blooms and the rest fell into place, but it didn't look right to me until I added the greenery, and now I smile every time I walk into my kitchen! I love this quick little project, I hope you will too, if you make one similar leave me a link in the comments I would love to see! I will leave you with a couple more pictures of the arrangement. Thanks for dropping by and having a peek!


Tuesday 21 March 2017

Live in color


Hi guys, I am back with an art journal page this time... I am working on loose pages so that I can add lots of texture without it affecting the rest of the album, once I have a few pages I will be able to bind the together in an a big juicy album.

I am playing around at scrapping 4 fun challenges - #86 recycling old stash everything I used on this layout was at least 5 years old... it feels great to be using up my supplies. I have been hoarding scrapbooking supplies forever, or at least that's the way it feels. I also was inspired by the weekly #ccbchallenge, this week to honour St-Patrick's day we had to use rainbow coloured projects...

I here is what I came up with... thanks for stoping by and  taking a look


Thursday 16 March 2017

Re-birth

Time to mark a new stage in my life by starting a brand-new blog. What good is creating if  no one sees your work, so that is my goal, to share my hobbies and passions with anyone who is interested.  In the past I focused primarily on paper crafts, scrap booking, card making but lately it is acrylic painting that is really driving me forwards.

I  found a good way to kick start my creativity is to participate in challenges so that's where this journey starts. I am part of a Facebook group for Canvas Corp Brands Collective... a group filled with talent and inspiration... they also host a monthly challenge #ccbchallenge, you can see where I am headed, right? This months challenge is Re-birth, the idea was to use the word or there mood board as inspiration for a project.


So this is a reversed 10x10 canvas, I used gesso on the backside of the canvas and painted my version of the pussy willow branches from the mood board and useded the edges of the canvas of the frame. I painted it with paynes gray and covered it in lace.

Here is a close-up of the pussy willow, it is hard to zero in on some of the details when you are looking at the project as a whole...


Then I created a few flower clusters for my corners using random flowers, leaves that I stamped and cut from  burlap and some trinkets that I have accumulated over the years... I assembled it all on some frayed burlap that I had in my stash and added a few rhinestones for
Some additional pop, here is a close up of those.


So there it is... hope you all enjoyed my project and this post, feel free to leave me a message with your thoughts! See you next time ;)